Heliostat
Project
MTM
Scientific, Inc.
A Heliostat is a device which is capable of
automatically reflecting sunlight towards a stationary target,
independent of the apparent position of the sun in the sky.
Traditionally, Heliostats have used mechanical gears and clock
mechanisms to accomplish this task. In the age of computers, the aiming
function is now most often accomplished by using computer control. This
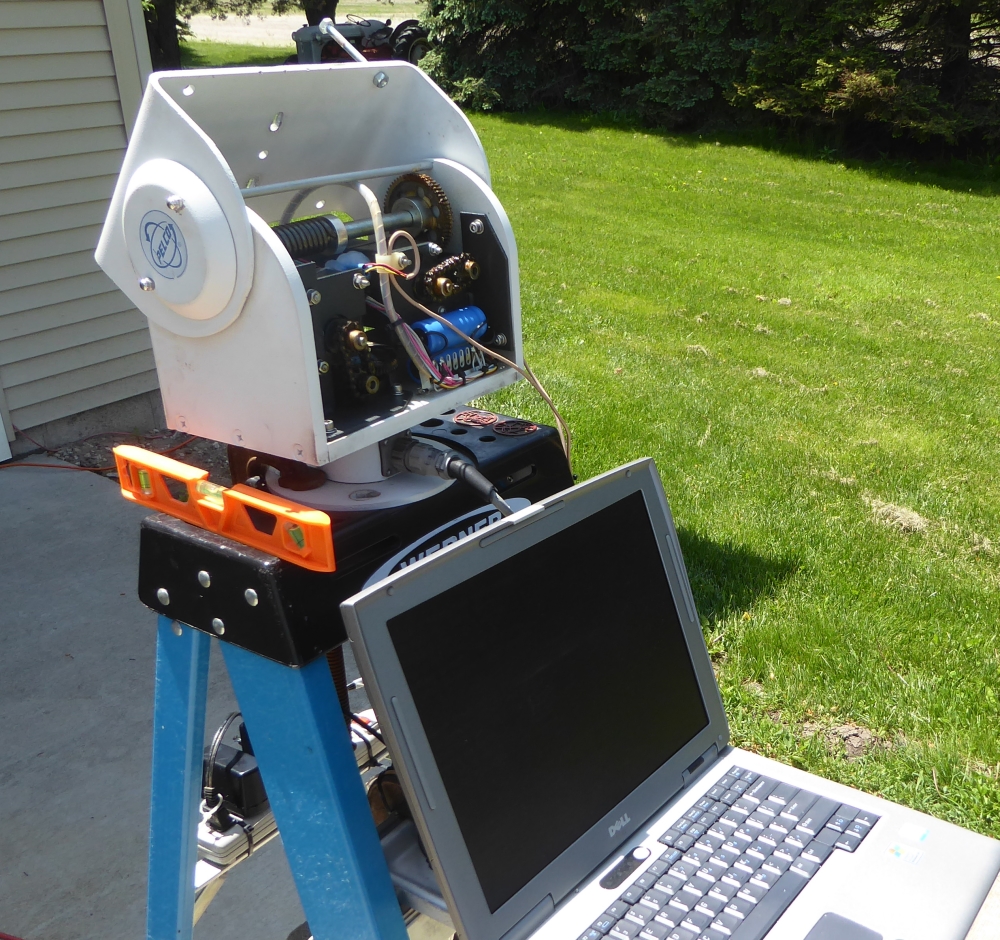
webpage describes the construction of a simple Heliostat based upon a
surplus Pelco security camera actuator. The actuator is controlled
using an older Dell laptop with a parallel port and serial port,
running a simple
computer program written in Basic.
The first step in building a Heliostat is to calculate the current
position of the sun in the sky for your location and time. This
actually turns out to be relatively simple to do. For example, there is
an open source computer program written in Basic for just that purpose.
The name of the program is SUNALIGN.BAS and it was written by
David Williams. Here is a link to it: SUNALIGN.BAS
This program calculates the Azimuth and Elevation of the sun's
position in the sky based upon your location and time. (Azimuth is the
compass heading: 180 degrees is due south. Elevation is the angle from
the horizon: 45 degrees is halfway between the horizon and directly
overhead.) You should be able to download and experiment with the
program using any old computer capable of running BASIC.
In addition to calculating the position of the sun, the SUNALIGN
program also has a Heliostat feature. The user simply enters the aiming
coordinates and the program responds with aiming coordinates for
redirecting sunlight to the desired target. There you have it!
That leaves the challenge of devising a method to aim a mirror
automatically at
the given coordinates.
There are all kinds of approaches to aiming a machine using
motors, gears and actuators. We actually presented and discussed
some of these challenges in our book "Build a
Solar Tracker". In
our book we described using linear actuators and a mechanical frame
built of an aluminum extrusion, called "80/20". In this project
we are going to keep things especially simple and use a surplus
actuator intended for the 2-axis motion of security cameras,
manufactured
by Pelco.
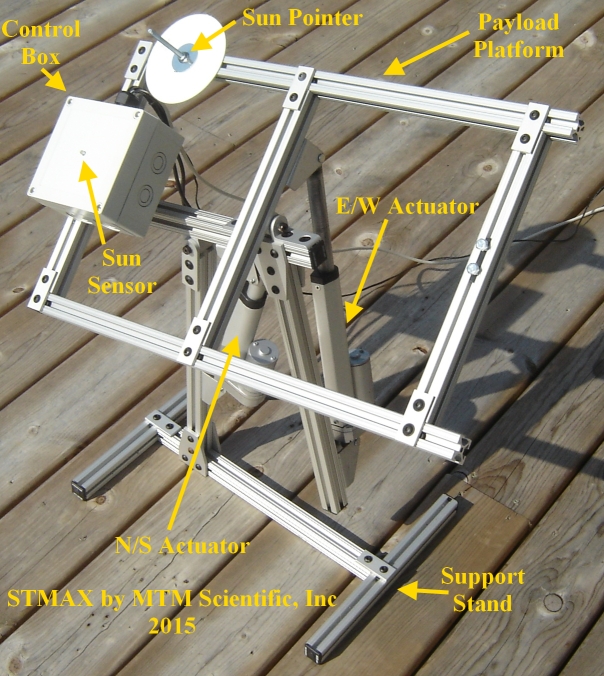
Figure
1. The STMAX Dual Axis Solar Tracker
Electronic Control and Positioning
With the Pelco unit we basically need to
accomplish two objectives: 1) We need to be able to move the actuator
in
Azimuth and Elevation by computer control, and 2) We need to know what
direction the Pelco actuator is actually pointing in real time. In
our case the Pelco actuator's movements are controlled by two 24VDC
motors. One motor controls the up and down motion (Elevation), and the
other motor controls the East and West motion (Azimuth). A DC motor's
motion can be either direction, simply depending on the arrangment of
the "+" and "-" electrical wire leads. We chose to control the motors
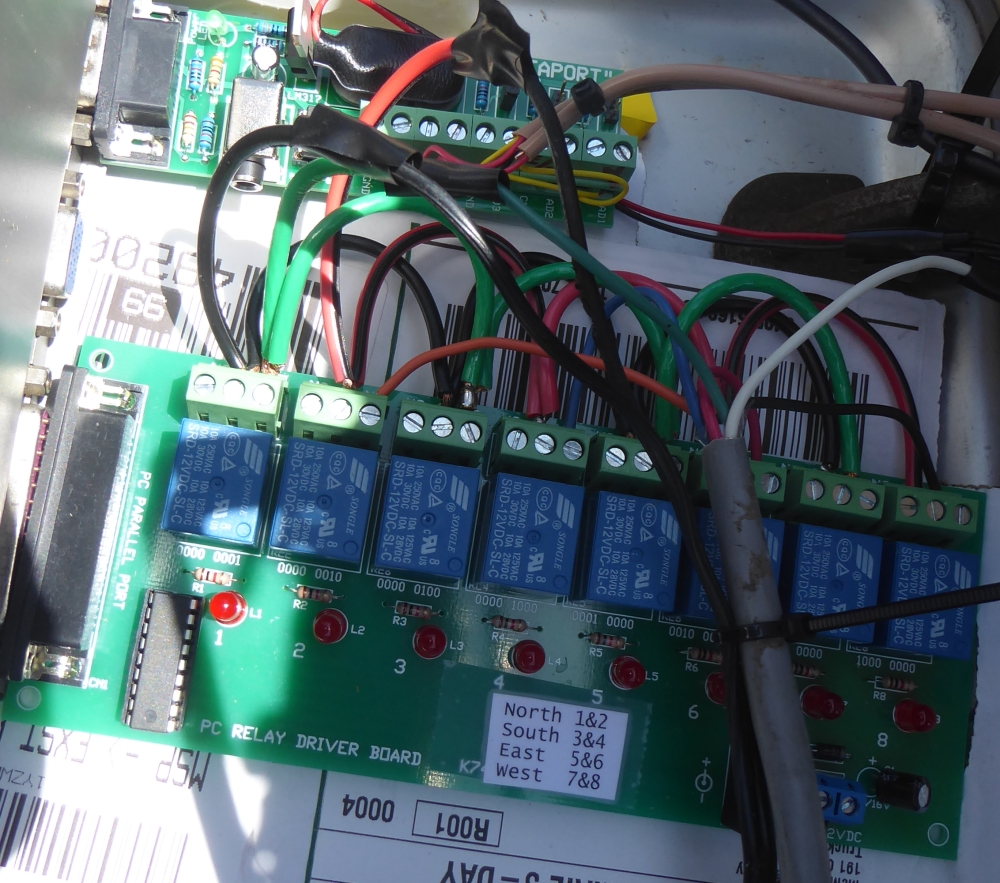
by using electromechanical relays. Although this may sound
complicated, it actually is quite easy to use a computer's parallel
port to control relays by using a kit for the purpose. We are using a
kit
from Electronic Kits, called "Parallel
Port Relay Board Kit CK-1601". Here is a photo of the Relay
Board Kit being used for this project.
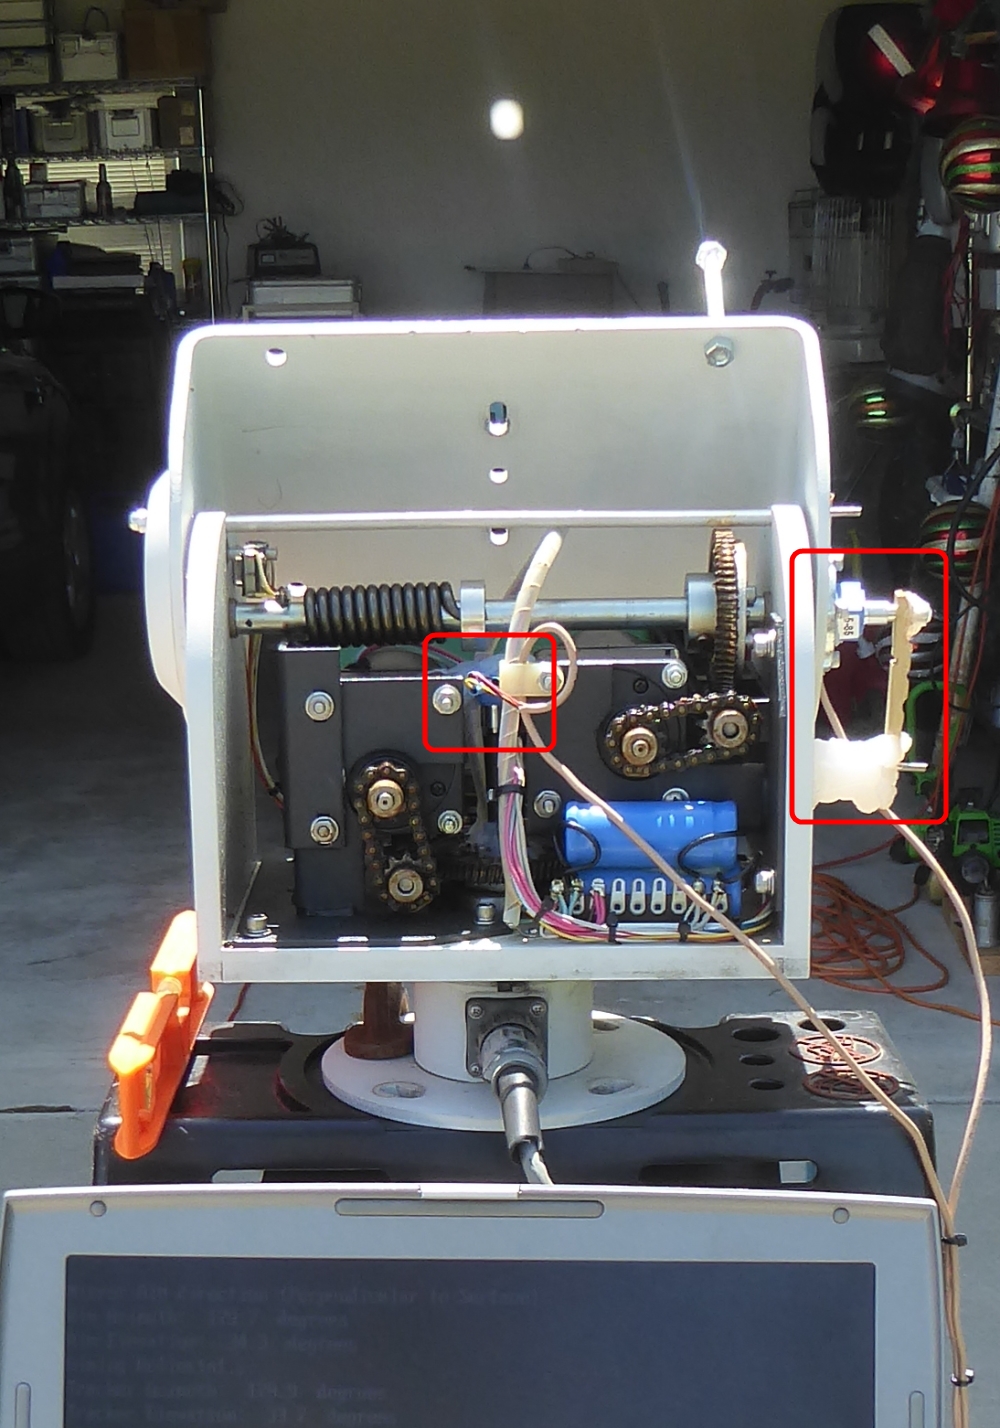
A more
challenging design challenge is adding sensors to the Pelco Actuator to
report the current aim direction. Pelco actually offers position
sensors on some of their actuators as an option. The surplus unit we
had available for this project did not have built-in sensors, so we had
to add position sensors. A very simple approach to this challenge
is to install linear potentiometers on both axes of motion. This
required some careful thought, and the liberal use of silicone sealant,
as shown in this photo.
When a linear
potentiometer is supplied with a stable supply voltage (e.g. 5 volts)
the rotary position of the wiper is reported as a voltage
proportional to the angle. By measuring the voltage reported at
different positions you can easily establish the voltage-position
relationship for both axes. Then the formulas for position vs voltage
can be deduced and used in the BASIC program coding to determine the
current Heliostat aim.
This approach leaves us with the challenge of measuring the output
voltages of the sensors using a computer. Well, once again there are
many different approaches to this problem. We chose to measure
the voltages using a Picaxe A/D circuit which reports voltages to the
computer using the serial port. We have described this approach
elsewhere: Serial A/D
using
a Picaxe. At one time we considered offering a kit for A/D
using a Picaxe called the "Dataport". Here is a Zip file
containing all the design information for the data acquisition module DATAPORT.ZIP
(You can see a Dataport in the photo with
the relays.) Note: Write to us at [email protected] if you
are interested in purchasing a Dataport Kit for $35, as we have several
left in stock.
With the aiming direction determined by software, and with the current
aim of the actuator reported by sensors, all we need to do now is write
a computer program in BASIC to move the Pelco to the correct
coordinates. This is where you have to put on your thinking cap and
think about how to accomplish that! The basic strategy is pretty
simple. For example, take the challenge of East-West aiming (Azimuth).
You must code
the program to measure where you are, and what direction the Pelco
needs to move. And then, while moving, measure the aim and stop when
the motion is sufficient to hit the target.
Here is a link to the BASIC program we wrote for our setup: PELCO.BAS
Of course, this program is specific to the calibrations and
wiring
arrangements we used in our setup. But the general outline of the
program gives the basic idea of what is needed.
Heliostats are quite amazing devices, and it is especially fun to see
how well this simple arrangement works! By mounting a mirror on the
Pelco
platform sunlight can be directed to any desired target. For example,
note the beam of light being projected onto the interior wall in the
garage photo above. A Heliostat could certainly be used to direct
sunshine into a window during Winter. Another use might be to focus
sunlight on a steam boiler, or some other thermal type engine. And of
course, there is nothing to prevent this identical setup from being
using as a regular dual axis solar tracker!
Michael
MTM